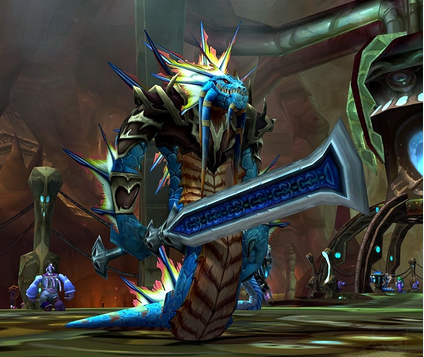
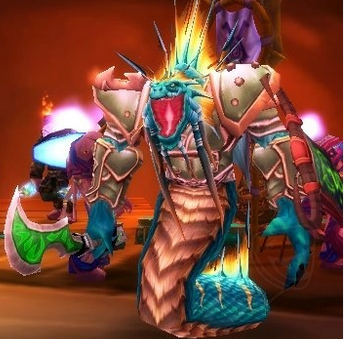
Trash Guide
Pack: Beast-Tamer + Hate-Screamer + Sporebat


| Mob | Ability | Notes |
|---|---|---|
| Beast-Tamer | Cleave | Physical AoE in front — always tank facing away from raid. |
| Bestial Wrath | Enrages self and two Sporebats. Kill Beast-Tamer first. | |
| Hate-Screamer | Sonic Scream | 5,000–6,000 Arcane damage on a player — heal through it. |
| Silence | Huge AoE Silence around it. Stun it or stay at range to avoid. | |
| Sporebat | Charge | Stuns and strikes any target 1–30 yards. Cannot be dead-zoned — can hit anyone in range. |
| Spore Burst | 1,300–1,600 Nature damage + DoT of 694–806 Nature damage. |
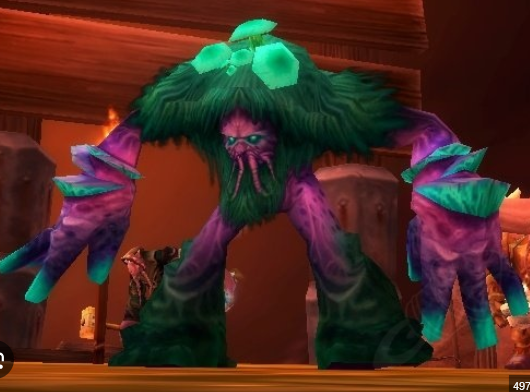
Pack: Underbog Colossi (3 Variants)
| Variant | Ability | Notes |
|---|---|---|
| A | Initial Infection | Disease dealing heavy nature damage — Cleanse immediately. |
| Sporequake | Channeled shake dealing constant nature damage — entire raid move out. | |
| B | Serpentshrine Parasite | Debuff on random target; a Parasite spawns — call it out, ranged kill it fast. |
| Acid Geyser | Channeled at random player — target must move to turn the Colossus away from the raid. Ranged/healers stay close during this variant. | |
| C | Frenzy | Enrages; attack speed greatly increases — healers compensate for tank damage spikes. |
| Atrophic Blow | Reduces Strength and Stamina on targets hit — tanks be aware of reduced HP pool. | |
| After Death | Toxic Pool / Adds / Refreshing Mist | Colossi trigger effects on death — don't stand in the pool, kill the adds, Refreshing Mist heals (good). |
Pack: Vashj'ir Honor Guard + Coilfang Priestess + Shatterer + Technician


| Mob | Ability | Notes |
|---|---|---|
| Honor Guard | Enrage | Increases attack damage and speed. |
| Frightening Shout | Fears all raiders in melee range — Shamans drop Tremor Totem. | |
| Knockback | Kicks targets back 7–10 yards. | |
| Mortal Cleave | Mortal Strike to all targets hit — reduces healing received. | |
| Coilfang Priestess | Holy Smite / Holy Fire | 3,150–3,850 Holy damage; Holy Fire also applies a magic DoT. |
| Priestess Spirit | On death: Spirit Healer spawns and spams Holy Nova — move enemies away from her corpse, get out of Holy Nova. | |
| Coilfang Shatterer | Shatter Armor | Reduces MT armor by 50% and damage dealt by 35% for 15 seconds — healers watch for spike. |
| Greyheart Technician | Hamstring | 66% slow on target. |
Pack: Greyheart Tidecaller + Nether-Mage + Skulker


| Mob | Ability | Notes |
|---|---|---|
| Tidecaller | Water Elemental Totem | Summons a water elemental — kill the TOTEM, do NOT target the elemental. |
| Poison Shield | Deals heavy nature damage on being struck — PURGE immediately (Shamans/Priests). | |
| Virulent Poison | Nature DoT — healers dispel. | |
| Nether-Mage | Frostbolt / Fireball / Cone of Cold / Rain of Fire / Arcane Volley | All function like player spells — interrupt and kick channeled casts. |
| Destruction Buffs | Frost/Fire/Arcane buff that massively increases damage — Purge or Mage Spellsteal immediately. | |
| Skulker | Kick | Interrupts spellcasting — do not cast while in melee range of a Skulker. |
Pack: Coilfang Serpentguard + Fathom-Witch + Serpentshrine Lurker

| Mob | Ability | Notes |
|---|---|---|
| Serpentguard | Spell Reflection | Reflects all spells for a short duration — stop casting when it's up. |
| Corrupt Devotion Aura | Reduces armor of all nearby raiders — spread awareness to melee. | |
| Fathom-Witch | Domination | Mind Controls a player for 10 seconds — CC the target immediately. Shamans use Grounding Totem to eat it. |
| Shadow Bolt | Instant cast heavy shadow damage. | |
| Shadow Nova | Damages and knocks back all nearby players — can drop them off the platform. Position tanks carefully. | |
| SSC Lurker | Poison Bolt Volley | Nature damage + DoT on multiple targets. |
| Shadow Bolt | Instant cast heavy shadow damage. | |
| Rancid Mushroom Primer | Summons mushrooms that grow over time — move away from them. |
Pack: Tidewalker Murlocs
These murlocs don't pose a significant threat if pulled correctly. They have several sub-types with different abilities but the strategy is the same regardless.
| Sub-type | Ability |
|---|---|
| Shaman | Chain Lightning |
| Depth-Seer | Healing Touch — interrupt it |
| Hydromancer | Frost Nova |

Hydross the Unstable
Overview
Hydross alternates between two elemental forms — Frost and Nature — based on where he stands relative to the purification beams. Each form stacks a debuff on the entire raid that multiplies elemental damage taken. Raids drag Hydross between forms before the debuff gets critical, triggering a transition that spawns four Water Elemental adds and resets all threat. Two tanks with specialized resistance gear are required.
Resistance Requirements
Frost Resistance Tank
Takes the boss on pull and after each Nature-to-Frost transition. Also picks up Pure Spawn of Hydross (Frost Elementals) during transitions.
Nature Resistance Tank
Handles Tainted Water Elementals on the pull. Takes the boss after each Frost-to-Nature transition. Also picks up Tainted Spawn of Hydross (Nature Elementals).
Abilities
| Ability | Form | Notes |
|---|---|---|
| Mark of Hydross | Frost | Stacking debuff — increases Frost damage taken every 15 sec: 10% → 25% → 50% → 100% → 250% → 500%. Transition at 100%. |
| Water Tomb | Frost | Targets a random player — stuns and deals Frost damage over time to all players within 8 yards. Spread at least 8 yards during Frost form. |
| Mark of Corruption | Nature | Same escalation as Mark of Hydross but increases Nature damage taken. Transition at 100%. |
| Vile Sludge | Nature | Targets a random player — Nature DoT and reduces damage dealt and healing taken by 50%. Does not spread. Far less dangerous than Water Tomb. |
| Summon Water Elemental | Transition | Spawns four elementals on each form swap. Pure Spawn (Frost) or Tainted Spawn (Nature) depending on the transition. Incoming resistance tank picks them all up. |
Debuff Stack Reference — Transition at 100%
Phase Breakdown
Approach from the right side near the Tainted Water Elementals. The Nature Resistance tank picks up these two adds and kills them while the Frost Resistance tank pulls Hydross. Do not aggro the Purified Elementals on the left — if untouched they despawn on their own. Once engaged, the conveyor belt stops.
Hydross deals Frost damage and casts Water Tomb. The whole raid takes the Mark of Hydross debuff every 15 seconds. Hold until it hits 100%, then the Frost tank drags Hydross back through the beams.
Four Water Elementals spawn. The incoming resistance tank picks up the boss and all four adds. The raid kills the adds before returning to the boss to give the tank time to build threat. Warlocks Banish an add if the tank is struggling. Hunters use Misdirection on the incoming tank.
Nature damage and Vile Sludge. Positioning is relaxed here — no spread required. Vile Sludge targets need prompt heals. Hold until Mark of Corruption hits 100%, then transition back to Frost. Repeat until dead.
Role Notes
Tanks
- Two main tanks — full Frost Resist and full Nature Resist
- Have backup off-tanks ready for add control during transitions
- Call transitions clearly so the raid stops damage
- Incoming tank: get into position before the drag so you grab immediately
- Warlocks can Banish adds to help if you're overwhelmed
Melee DPS
- Stop all damage the instant a transition is called
- Kill elemental adds before touching the boss after any transition
- Spread 8 yards from others during Frost form
Ranged DPS
- Stop all damage on transition calls, including DoTs
- Kill adds before the boss after transitions
- Hunters: Misdirection on incoming tank during transitions
- Warlocks: Banish adds if tank needs help
- Spread 8 yards during Frost form
Healers
- Save cooldowns for transitions — four adds on the new tank is a damage spike
- Spot-heal Water Tomb targets promptly
- Spread 8 yards during Frost form
- Nature form is easier — focus on Vile Sludge targets
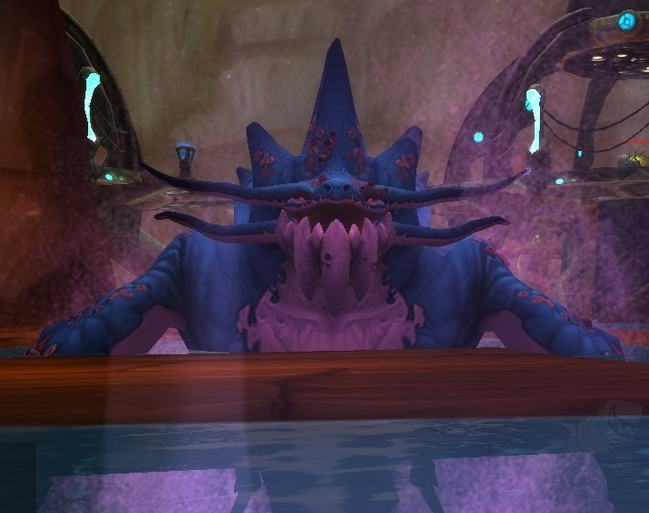
The Lurker Below
Overview
The Lurker Below is a two-phase alternating fight. Phase 1 is a tank-and-spank with a jump mechanic (Spout). Phase 2 is a short add phase while the boss submerges. The fight cycles between these two phases until the boss is dead. The key mechanic is jumping into the water to dodge Spout — but the water deals Scalding Water damage each time you enter it, so do not spam jump.
Before the Pull
After clearing all six platforms, assign positions:
- Hunters, Warlocks, and Mages split across the three small outer platforms — they will handle Coilfang Ambushers during Phase 2 submerge.
- Everyone else spreads evenly on the large central platform.
- One raid member with 300+ Fishing fishes up the boss from the central water. This triggers the encounter.
Abilities
| Ability | Phase | Notes |
|---|---|---|
| Geyser | Phase 1 | Targets a random player — 10-yard AoE knockback. Spread out across the large platform so Geysers don't hit clusters. |
| Whirl | Phase 1 | Physical damage and knockback to all players in melee range. Tank is the primary target. Melee may get clipped. |
| Spout | Phase 1 | Rotating water beam from the boss's mouth. Deals massive damage. Jump into the water when it turns toward you, get out when it passes. Can be ignored with Ice Block or Divine Shield. |
| Water Bolt | Phase 1 | One-shot damage to a random raid member — only casts if nobody is in melee range. Keep the tank on the boss at all times. |
| Coilfang Ambusher | Phase 2 | Spawn on small outer platforms. CC them immediately. If they aggro a healer they can kill them quickly. |
| Coilfang Guardian | Phase 2 | Spawn on the large platform. Dangerous cleave — off-tanks pick up and face away from the raid. Can be stunned. |
Phase Breakdown
Tank stands at the edge of the large platform, staying in melee range to prevent Water Bolt. Melee DPS attacks normally. Spread out to reduce Geyser overlap.
When Spout begins, watch which direction the beam is rotating. Continue damaging the boss until Spout turns toward you, then jump into the water. Get out immediately after it passes. Players with Ice Block or Divine Shield can ignore Spout entirely.
Note: Lurker only looks at the melee threat table during Phase 1. Ranged DPS will not pull aggro.
Coilfang Ambushers spawn on the small outer platforms. CC them immediately — Hunters trap, Warlocks banish, Mages sheep. Once CC'd, ranged on the small platforms help kill Coilfang Guardians on the large platform. Once Guardians are dead, melee jumps to small platforms to kill the Ambushers.
Role Notes
Tanks
- Main tank stays at the platform edge in melee range to prevent Water Bolt
- Intercept back to the boss immediately if Whirl knocks you back
- Off-tanks: pick up Coilfang Guardians during Phase 2 and face them away from the raid
- Jump in water to dodge Spout — don't spam jump
Melee DPS
- Spread out on the large platform to minimize Geyser overlap
- Phase 2: focus Coilfang Guardians first, then jump to small platforms for Ambushers
- You can avoid Spout by continuously moving behind the boss during the cast
Ranged DPS
- Hunters / Warlocks / Mages: be on small platforms and ready to CC Ambushers the moment Phase 2 starts
- After CCing Ambushers, assist in burning Guardians on the large platform
- Jump in water to dodge Spout — don't spam jump
Healers
- Phase 1 is relatively easy — spot heal Geyser targets
- Phase 2 gets very hectic if adds aren't handled quickly — especially at emergence
- Jump in water to dodge Spout — don't spam jump
- If Ambushers are loose and hit a healer, call it immediately

Leotheras the Blind
Overview
Leotheras alternates between Human form and Demon form throughout the fight. Every transition wipes all threat completely. A Warlock tank in Fire Resistance gear is required to hold the Demon form using Searing Pain. During Demon form, up to five players will have Inner Demons spawned — if a player fails to kill their Inner Demon in time, they become permanently Mind Controlled and must be killed by the raid. At 15%, Leotheras splits into two separate bosses that must be tanked simultaneously.
Before the Pull
Clear all trash in the room — you need open space to run from Whirlwind. Assign a Warlock tank in Fire Resistance gear to hold Demon form the entire fight using Searing Pain. This Warlock needs dedicated healer support throughout.
Abilities
| Ability | Form | Notes |
|---|---|---|
| Whirlwind | Human | Leotheras spins and moves toward random players. Everyone runs away from the boss during Whirlwind. Applies a bleed DoT on hit. Ranged can continue attacking if it's not near them. Threat wipes at the end of each Whirlwind. |
| Chaos Blast | Demon | Fire damage to the highest-threat target. This is why the Warlock tank uses Searing Pain — to stay at the top of the Demon form threat table. |
| Insidious Whisper | Demon | Targets up to five random players and spawns a copy of them as an Inner Demon. Players must kill their demon immediately or become permanently Mind Controlled. Inner Demons can only be attacked by the player they belong to. |
| Split / Shadow of Leotheras | Phase 3 | At 15% HP, Leotheras splits into Human form and Demon form as two separate bosses. Each needs its own tank. Burn Human form while the Warlock holds Demon form. |
Phase Breakdown
The main tank holds Leotheras. When Whirlwind is cast, everyone runs away from the boss — melee and ranged alike. Ranged DPS can keep attacking during Whirlwind as long as the boss isn't spinning toward them. The bleed from a Whirlwind hit needs prompt healing.
After at least 45 seconds, Leotheras transitions to Demon form. Again, all threat wipes on the swap.
The Warlock tank takes over, spamming Searing Pain to hold threat on Demon form. All other DPS waits for the Warlock to build a safe threat lead before attacking.
Threat resets again when Leotheras transitions back to Human form. The cycle repeats until 15%.
Leotheras splits into two bosses. The entire raid focuses Human form and burns it down with all remaining offensive cooldowns. The Warlock tank holds the Demon form with healer support. Kill Human form before the Demon form overwhelms the Warlock tank.
Role Notes
Tanks
- Main tank holds Human form — rebuild threat after every Whirlwind and every form swap
- Warlock tank holds Demon form with Searing Pain spam the entire fight
- If targeted by Insidious Whisper, swap to two weapons and use offensive cooldowns to kill the Inner Demon
- Split phase: Warlock holds Demon form while raid burns Human form
Melee DPS
- Run away from Leotheras the instant Whirlwind starts
- Stop attacking when Whirlwind ends — wait for the tank to rebuild threat
- Be patient after form swaps — threat resets every time
- Kill your Inner Demon immediately if targeted — stop all other damage
Ranged DPS
- You can attack during Whirlwind if the boss isn't spinning toward you
- Be patient after Demon form transitions — let the Warlock build threat
- Kill your Inner Demon immediately if targeted
- Save major cooldowns for the split phase at 15%
Healers
- Spot-heal Whirlwind bleed targets — the DoT stacks up quickly on multiple people
- Be careful with big heals during transitions — threat resets can send aggro to a healer instantly
- Assign healers to the Warlock tank specifically during the split phase
- If a healer gets Insidious Whisper, they may struggle to kill the demon — assign a DPS to assist if possible
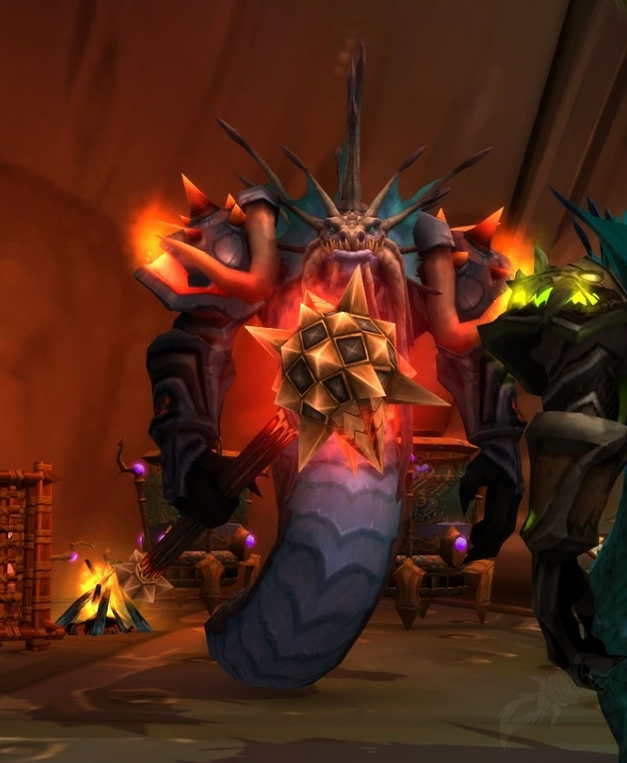
Fathom-Lord Karathress
Overview
Karathress is a council-style fight. He and his three Fathom-Guards engage together, and each guard must be killed before you kill Karathress. Killing each guard grants Karathress a new ability, and if Karathress drops below 75% while any guard is alive, he gains a massive haste and cast speed buff that will almost certainly wipe the raid. Four separate tanks are needed.
Kill Order
Fathom-Guard Abilities
Fathom-Guard Tidalvess (Kill First)
| Ability | Notes |
|---|---|
| Spitfire Totem | Kill immediately. Lasts 1 minute. Deals significant fire damage to 5 random players. Every time it spawns — during Tidalvess and after he dies when Karathress inherits the ability — the entire raid swaps and kills it. |
| Frost Shock | Frost damage and movement slow on the tank. |
| Earthbind Totem | Slows all nearby players. Destroy it when possible. |
| Poison Cleansing Totem | Removes a poison effect from Tidalvess periodically. Destroy it to stop it cleansing. |
Fathom-Guard Sharkkis (Kill Second)
| Ability | Notes |
|---|---|
| The Beast Within | Increases all damage by 30% and pet damage by 50%. Save tank defensive cooldowns for this. |
| Summon Fathom Lurker | Elemental pet — deals melee damage and casts Knock Away (threat wipe). Explodes for ~4,000 Nature AoE damage on death. Do NOT kill it near the raid — tank it away and let it die out of range, or make sure people spread before it dies. |
| Summon Fathom Sporebat | Beast pet — melee damage and Knock Away. Cannot be CC'd. Tank it with the guard. |
| Multi-Toss | Targets a random player and up to three nearby, dealing Physical damage. |
| Leeching Throw | Drains health and mana from a random target for 12 seconds. Cannot be dispelled. |
Fathom-Guard Caribdis (Isolated — Kill Third)
| Ability | Notes |
|---|---|
| Healing Wave | Heals a random boss/guard for a large amount every 15 seconds. Interrupt every cast. Fast cast time — have multiple interrupters assigned. Curse of Tongues and Mind-numbing Poison slow the cast to make it easier to kick. |
| Tidal Surge | Freezes a random player and all within 10 yards for 3 seconds. Spread out to avoid chaining. Becomes Karathress's ability after Caribdis dies. |
| Summon Cyclone | Spawns roaming blue whirlwinds. They lift players and apply a cast speed debuff. Move away from them. |
| Water Bolt Volley | Instant cast — Frost damage to all nearby players. |
Fathom-Lord Karathress
| Ability | Notes |
|---|---|
| Cataclysmic Bolt | Targets a random player — deals 50% of their max health and briefly stuns. Healers need to be ready to top this player immediately. |
| Sear Nova | Fire damage to all players in melee range. Ranged stay out. Tank takes this. |
| Blessing of the Tides | Gained at 75% if any guard is alive — massive attack and cast speed buff. Wipe mechanic. |
| Inherited Powers | Gains Spitfire Totem from Tidalvess, The Beast Within from Sharkkis, and Tidal Surge from Caribdis as each guard dies. |
| Enrage | 10-minute hard enrage — increases attack speed and damage. Kill the fight before this. |
Encounter
Assign four tanks before pulling: Main Tank on Karathress (building threat throughout), a Druid or Paladin tank on Sharkkis and his pets, an Off-Tank on Tidalvess, and a Warrior tank with a healer and interrupt team dragging Caribdis far away from the rest of the raid.
The Caribdis group's job is simple: keep her separated so her Healing Wave doesn't heal other targets easily, and interrupt every single Healing Wave cast. Assign multiple interrupters — it has a fast cast time. Curse of Tongues or Mind-numbing Poison on Caribdis makes it significantly easier to catch.
The main raid focuses Tidalvess while the Main Tank holds Karathress. Every time a Spitfire Totem spawns, every DPS in the raid swaps to it and kills it immediately — then returns to Tidalvess. No exceptions.
Destroy Tidalvess's Poison Cleansing Totem when it spawns to prevent it from cleansing him.
After Tidalvess dies, the raid cleaves down Sharkkis. Karathress now has Spitfire Totem — keep killing it the instant it spawns. The Sharkkis tank picks up his summoned pets. Spore Explosion on the Fathom Lurker's death deals ~4,000 Nature AoE to nearby players — make sure the Lurker is positioned away from the raid before it dies, or everyone spreads before the kill shot.
Save tank defensive cooldowns for when Sharkkis or Karathress uses The Beast Within — their damage jumps significantly.
Once Tidalvess and Sharkkis are dead, the whole raid converges on Caribdis. Keep spreading out — Tidal Surge freezes everyone within 10 yards of the target. Continue interrupting Healing Wave until she dies. Karathress now also has Tidal Surge after she dies.
All guards are dead. The Main Tank has had the entire fight to build threat on Karathress. Pop offensive cooldowns and burn. Continue killing Spitfire Totems whenever they spawn. Stay spread for Tidal Surge. Healers watch for Cataclysmic Bolt targets — the 50% max health hit needs immediate attention.
Role Notes
Tanks
- Main Tank: hold Karathress the entire fight, building threat throughout
- Druid/Paladin: hold Sharkkis and pick up his summoned pets
- Off-Tank: hold Tidalvess
- Warrior: drag Caribdis far away from the raid with a dedicated healer
- Save defensive cooldowns for The Beast Within on Sharkkis and Karathress
Melee DPS
- Always swap to Spitfire Totem immediately when it spawns
- If assigned to interrupt Caribdis, stay alert — the cast is fast
- Spread out when converging on Caribdis to avoid Tidal Surge chains
- Don't kill the Fathom Lurker near the raid — call out before kill shot
Ranged DPS
- Always swap to Spitfire Totem immediately when it spawns
- Caribdis interrupt team: use Curse of Tongues to slow her cast speed
- Stay out of melee range of Karathress (Sear Nova)
- Spread out for Tidal Surge during Caribdis and Karathress phases
Healers
- Three or four tanks taking simultaneous damage — assign healers clearly
- Dedicated healer on the Caribdis tank (Warrior isolated far away)
- Spread out with the Caribdis group for Tidal Surge
- Immediately top Cataclysmic Bolt targets (50% max HP hit)
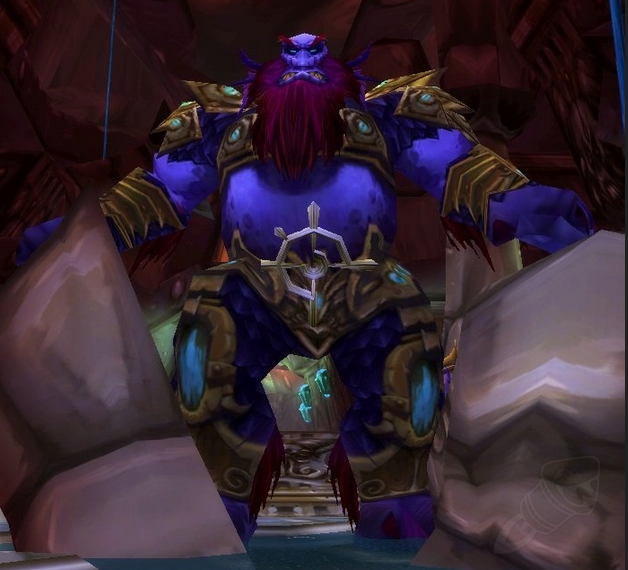
Morogrim Tidewalker
Overview
Tidewalker is a three-phase fight that cycles between burning the boss, surviving Murloc waves, and a final burn race at 25%. The Murloc waves are the hardest part — they rush in fast, and if AoE tanks can't hold threat, the Murlocs beeline for healers and kill them. Threat discipline during Murloc waves is the difference between a clean kill and a wipe.
Before the Pull
Position Murloc tanks and crowd controllers in the hallways and near the waterfalls before the pull — the Murlocs rush in fast from both entrances and a head start matters. Hunters pre-place Frost Traps in the entrance paths. Have Super Sapper Charges ready for snap AoE threat on Murloc groups. Position the raid behind Tidewalker near one of the pillars so Tidal Wave only hits the main tank.
Abilities
| Ability | Notes |
|---|---|
| Tidal Wave | Frost damage cone in front of Tidewalker plus a 15-second melee attack speed debuff. Keep Tidewalker always facing away from the raid — only the main tank should ever be in front of him. |
| Watery Grave | Teleports 4 random players to the waterfall locations, stuns briefly, and drops them from above for fall damage. Assign 1-2 Druid healers to instantly throw HoTs on Watery Grave targets. The stun and fall damage together can kill an unhealed player quickly. |
| Earthquake | Deals damage to everyone within 50 yards and triggers a Murloc wave — two packs of six Tidewalker Lurkers rush in through both room entrances. Use bandages on yourself after Earthquake, but wait to heal others until Murloc threat is established. |
| Summon Water Globule | Triggered at 25% HP. Spawns slow-moving water bubbles at each waterfall that fixate on random players and explode for heavy damage on contact. Move Tidewalker into a corner away from the Globules and burn the boss before they reach the raid. |
Phase Breakdown
Move Tidewalker to a pillar, facing away from the raid. The entire raid positions behind the boss to both damage him and be in position to AoE Murloc waves when they arrive. The main tank is the only player who should ever be in front of Tidewalker.
Between waves, this phase is straightforward. The challenge is managing Watery Grave without pulling healer attention away from the tank for too long.
When Earthquake hits, Murloc Lurkers charge in from both room entrances simultaneously. AoE tanks rush to intercept. Hunters fire Frost Traps in their path. Mages cast Rank 1 Blizzard to slow them without generating much threat. Everyone else waits.
If a Murloc tank gets Watery Graved mid-wave, those Murlocs will follow them to the waterfall — which is better than them running loose on healers, as long as enough threat was built before the teleport. This is exactly why threat discipline early in the wave matters.
Once the wave is cleared, return to Phase 1 and resume burning the boss.
Water Globules spawn at each waterfall and slowly drift toward random raid members. The main tank moves Tidewalker into a far corner of the room, away from the Globule spawn points. The raid stacks on the boss and pops Bloodlust/Heroism plus all remaining offensive cooldowns. Kill Tidewalker before the Globules drift into the raid.
Role Notes
Tanks
- Main tank: Tidewalker always faces away from the raid — never let Tidal Wave clip anyone
- AoE Murloc tanks: use Super Sapper Charges for snap threat on wave arrival
- Move Tidewalker to a corner at 25% to keep the raid away from Globules
- If Watery Graved mid-wave, hope threat is high enough that Murlocs chase you to the waterfall instead of healers
Melee DPS
- Do not attack Murlocs until the AoE tanks clearly have threat
- Use Heavy Netherweave Bandage on yourself after Earthquake — do not waste healer mana
- Stay behind Tidewalker at all times
- Pop all cooldowns at 25% for the Globule burn
Ranged DPS
- Hunters: pre-place Frost Traps in Murloc entrance paths before Earthquake
- Mages: Rank 1 Blizzard to slow Murlocs without threatening healers
- Warlocks: Seed of Corruption once AoE tanks have established threat
- Use bandages after Earthquake before healing is distributed
- All cooldowns at 25% for the burn phase
Healers
- Assign 1-2 Druids specifically to Watery Grave targets — HoTs work perfectly for the fall damage
- Do not spam-heal the raid immediately after Earthquake — wait until Murloc threat is established or you become the Murlocs' target
- Raid damage after Earthquake is heavy but manageable; prioritize tanks first, then wait for AoE tank threat
- Be ready to move away from Globules in Phase 3
Lady Vashj
Overview
Vashj is a three-phase fight. Phase 1 and Phase 3 are pure execution. Phase 2 is a coordinated add-control phase where the raid must pass Tainted Cores between players to disable four Shield Generators. Once all generators are down, Phase 3 is a burn race against an ever-expanding poison carpet.
Before the Pull
Spread the raid evenly around the platform before pulling. Hunters spread to the corners and outer ring for Enchanted Elemental intercept. Assign the entire Tainted Core chain now — who loots, who relays, who stands at each generator. Healers assign one per tank plus raid healers for the core group.
Abilities
| Ability | Notes |
|---|---|
| Shoot | Physical damage to highest-threat target when no one is in melee range. Tank stays in melee. |
| Multi-Shot | Hits a random player and nearby targets. Spread out to reduce splash. |
| Shock Blast | Nature damage plus 5-second stun on highest-threat target. Shaman Grounding Totem can absorb this. |
| Entangle | Roots and damages all players within 15 yards. Cannot be dispelled. Removed by Blessing of Freedom, Cloak of Shadows, Druid shapeshifting, or PvP trinket. |
| Static Charge | Debuff on a random player — deals 2,000 Nature damage to everyone within 5 yards. Move away immediately if you get it. |
| Forked Lightning P2 | Frontal cone Nature damage during Phase 2. Position accordingly. |
| Persuasion P2 | Mind controls a random player for 20 seconds at 999% damage. Cannot be CC'd but can be taunted. Tanks watch for this constantly. |
Phase 2 Adds
| Add | Priority | Notes |
|---|---|---|
| Enchanted Elemental | Kill on sight | Runs to Vashj and gives her a permanent +5% damage stack per reach. Hunters handle these. |
| Tainted Elemental | Kill quickly | Despawns after 15 seconds. Drops the Tainted Core. Focus fire and loot immediately. |
| Coilfang Elite | Melee target | Cleave — tanks must face away from raid and melee. |
| Coilfang Strider | Ranged/kite | Fears all players in melee range every 2 seconds. Melee ignores entirely. Kite with Warlock (Searing Pain) and Shaman (Frost Shock). |
| Toxic Sporebat P3 | Burn fast | Drops poison clouds. More clouds = faster platform coverage = enrage timer. Hunters and Warlocks prioritize. |
Phase Breakdown
Straightforward tank-and-spank. Manage Static Charge by running out of the group immediately when you get it. Save major offensive cooldowns for Phase 3. Healers use mana consumables now — the fight is long.
Tainted Core Chain
Tanks must taunt off Mind Controlled (Persuasion) players immediately. A healer one-shotted by a MC'd player can collapse the raid.
Vashj drops her shield. Do NOT immediately attack her — burn the remaining Phase 2 adds first so the main tank can build threat. Hunters and Warlocks burn Toxic Sporebats to slow cloud spread. Pop Bloodlust/Heroism and all remaining offensive cooldowns immediately.
- Main tank should be near Vashj when the 4th generator drops for proximity threat.
- Hunters: Misdirection on the main tank to help establish threat fast.
- Have a designated direction for the raid to slowly move as poison clouds accumulate.
Role Notes
Tanks
- Use Misdirection on pull to front-load threat
- Off-tanks: Coilfang Elites faced away from melee in Phase 2
- Taunt off Persuasion targets immediately
- Main tank near Vashj when 4th generator drops
Melee DPS
- Stay behind Coilfang Elites — Cleave kills you
- Never go near Coilfang Striders
- Move out on Static Charge immediately
- Kill adds at Phase 3 start before hitting Vashj
Ranged DPS
- Phase 2: Coilfang Striders are your target
- Move out on Static Charge immediately
- Save cooldowns for Phase 3
- Burn Sporebats in Phase 3 to slow cloud spread
Healers
- Spread evenly across the platform
- Assign healers to tanks and core group
- Use mana consumables early and often
- Prioritize core holders in Phase 2